Are you looking for the perfect finishing touch to your vinyl flooring? Vinyl floor molding and reducers are the small details that make a big difference.
They not only protect your floors but also create a smooth, polished look between different surfaces. If you want your space to look seamless and professional, understanding these pieces is key. Keep reading to discover how vinyl floor molding and reducers can transform your flooring and why they should be on your must-have list.
Choosing The Right Vinyl Floor Molding
Choosing the right vinyl floor molding is key to a neat and finished look. It hides gaps between floors and walls. It also helps smooth transitions between rooms or floor types. Picking the correct molding makes your floor last longer and look better. This guide explains what to consider for the best choice.
Types Of Moldings For Vinyl Floors
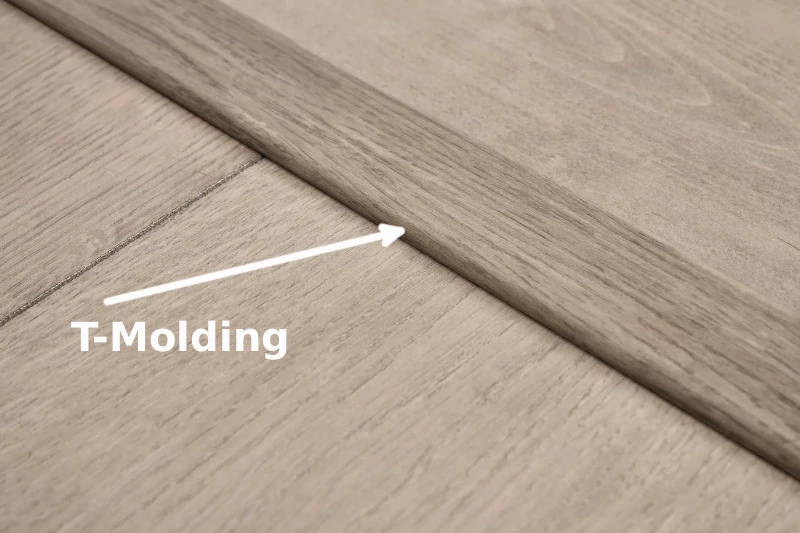
Vinyl floors need specific moldings. Baseboards cover the gap between floor and wall. Reducers help when vinyl meets lower floors. T-moldings join two floors of the same height. Stair nosing protects edges on stairs. Each type serves a clear purpose. Choose based on the floor layout and height difference.
Matching Moldings With Floor Design
Color and style must match the floor. Moldings can blend or stand out. Light wood floors look good with light moldings. Dark vinyl pairs well with dark trims. Patterns and textures also matter. Smooth floors need smooth moldings. Textured floors suit textured moldings. Matching creates harmony and beauty.
Materials And Durability
Moldings come in vinyl, wood, and metal. Vinyl moldings resist moisture and wear. Wood gives a classic look but needs care. Metal is strong but less common. Choose a material that suits your room. Durability is important in busy areas. The right material keeps moldings looking good long.

Credit: www.reddit.com
When To Use A Reducer
Choosing the right transition piece is key for a smooth floor look. A vinyl floor reducer helps connect floors of different heights. It creates a gentle slope between surfaces. This section explains when to use a reducer and why it matters.
Purpose Of Reducers In Flooring
Reducers bridge the gap between two floors with different heights. They prevent tripping by easing the step down. They cover the exposed edges of flooring, protecting them from damage. This molding improves the floor’s appearance by creating a neat finish.
Common Scenarios For Reducer Use
Reducers work best where vinyl meets lower flooring types. Use them between vinyl and hardwood, laminate, or tile floors. They fit well at doorways or room entrances where floors change height. Reducers also help near stairs or sunken areas to avoid sharp edges.
Tools Needed For Installation
Installing vinyl floor molding or a reducer requires some basic tools. These tools help you fit the pieces tightly and finish the job neatly. Having the right tools makes the work easier and faster. It also helps to avoid mistakes and damage to your floor or molding.
Essential Tools List
Start with a tape measure to get exact lengths. A miter saw or handsaw will cut the molding at the right angles. Use a hammer or rubber mallet to tap the molding into place gently. A utility knife is handy to trim vinyl or remove excess. A pry bar can help remove old molding without damage. Finally, a nail set and finishing nails secure the molding firmly. Have a pencil to mark measurements clearly.
Safety Tips During Installation
Wear safety goggles to protect your eyes from dust and debris. Gloves can prevent cuts and blisters on your hands. Work in a well-lit area to see cuts and placements clearly. Keep your fingers away from saw blades and cutting tools. Secure the molding before cutting to avoid slips. Take breaks to avoid fatigue and stay focused. Follow tool instructions and warnings carefully for safe use.

Credit: allureflooring.com
Step-by-step Installation Guide
Installing vinyl floor molding or a reducer can improve the look of your flooring edges. This step-by-step guide breaks down the process into easy parts. Follow these clear steps to get a neat finish.
Preparing The Floor Edges
Start by cleaning the floor edges. Remove dust, dirt, and old adhesive. Ensure the surface is dry and smooth. Check for any uneven spots and fix them. Proper preparation helps the molding stick better.
Cutting And Fitting The Molding
Measure the length needed for the molding. Use a saw to cut the molding to size. Cut slowly to avoid splintering or damage. Test fit the pieces along the edge. Make small adjustments for a perfect fit.
Securing The Molding In Place
Apply adhesive or use nails to secure the molding. Press the molding firmly to the floor edge. Wipe away any excess glue immediately. Allow the adhesive to dry fully before walking on it. This ensures a strong, lasting hold.
Finishing Touches For A Seamless Look
Finishing touches make a vinyl floor molding or reducer look complete. They hide small gaps and create a smooth transition between floors. These details improve the room’s overall appearance. They also protect edges from damage and dust. Paying attention to these steps ensures a seamless and polished look.
Filling Gaps And Seams
Small gaps often appear between the molding and the floor. Filling these gaps prevents dirt and moisture buildup. Use a flexible caulk that matches the molding color. Apply it carefully with a caulking gun or a small tool. Smooth the caulk with a damp finger or a plastic scraper. Let it dry fully to keep the finish clean and neat.
Cleaning And Maintenance Tips
Keep vinyl floor molding looking fresh by cleaning regularly. Use a soft cloth or a vacuum with a brush attachment. Avoid harsh chemicals that can damage the vinyl. Mild soap and water work well for most cleaning needs. Dry the molding after cleaning to prevent moisture damage. Check the molding often for wear or loose edges. Fix small issues early to maintain a seamless look.
Common Mistakes To Avoid
Installing vinyl floor molding or reducers can be tricky. Mistakes can cause gaps, uneven edges, or damage. Avoiding common errors helps create a clean, professional look. Focus on key steps for a smooth finish.
Incorrect Measurements
Measuring too short or too long causes gaps or overlaps. Always measure twice before cutting. Use a tape measure to get exact lengths. Cut slowly and check fit before fixing in place.
Improper Adhesive Use
Using the wrong glue can weaken the hold. Some adhesives damage vinyl or do not stick well. Choose adhesives made for vinyl floors. Apply glue evenly and avoid excess to prevent mess.
Ignoring Expansion Gaps
Vinyl floors expand and contract with temperature changes. Skipping expansion gaps causes buckling or lifting. Leave small gaps at edges for movement. Cover gaps with molding to keep a neat look.
Cost Considerations And Budgeting
Planning your budget for vinyl floor molding or reducers is important. Knowing the costs helps you avoid surprises. It also helps you make smart choices. Costs vary by material, labor, and installation method. Understanding these parts makes your project easier.
Material Costs
Vinyl floor molding comes in different types and prices. Basic vinyl moldings cost less. Fancy designs or wider moldings cost more. Prices usually range from $1 to $5 per linear foot. Choose materials that match your floor style and budget. Remember, quality materials last longer.
Labor Expenses
Labor costs depend on where you live and project size. Installing molding may take a few hours. Professionals charge between $50 and $100 per hour. Complex areas or uneven floors increase labor time. Always ask for a clear price estimate before starting.
Diy Vs Professional Installation
Doing it yourself saves money on labor. Basic tools and patience are needed. Mistakes can cause extra costs for repairs. Professionals work faster and offer a clean finish. They have experience with tricky spots. Weigh the cost of your time and skill before deciding.
Credit: onflooring.com
Frequently Asked Questions
What Is Vinyl Floor Molding/reducer Used For?
Vinyl floor molding/reducer connects floors of different heights smoothly. It helps avoid tripping and creates a clean finish between surfaces.
How Do I Install Vinyl Floor Molding/reducer?
Clean the floor surface first. Then, cut the molding to size and press it firmly into place using adhesive or nails.
Can Vinyl Floor Molding/reducer Hide Uneven Floor Edges?
Yes, it covers uneven edges and gaps between floors. This improves the floor’s look and prevents dirt from collecting.
What Types Of Vinyl Floor Molding/reducer Are Available?
There are T-moldings, stair nosings, and reducers. Each fits different floor transitions and height differences for a neat appearance.
Final Words
Vinyl floor molding and reducers help create smooth transitions between floors. They protect edges from damage and give a clean look. Choosing the right molding keeps your floors safe and stylish. Easy to install and maintain, they fit many room types.
A small detail that makes a big difference in your space. Keep floors neat and edges strong with good molding. Simple steps for lasting floor beauty and function.