Are you thinking about upgrading your kitchen without spending a fortune? Laminate countertops installation might be the perfect solution for you.
They offer a stylish look, are easy to maintain, and can transform your space quickly. Imagine having a fresh, modern countertop that feels great under your hands and stays looking new for years. You’ll discover simple steps and expert tips to make your laminate countertop project smooth and successful.
Ready to give your kitchen the makeover it deserves? Let’s dive in!
Credit: www.lowes.com
Choosing The Right Laminate
Choosing the right laminate for your countertops is important. It affects the look and durability of your kitchen. Picking a good laminate means thinking about style, strength, and cost. This helps you find the best fit for your home and needs.
Popular Colors And Patterns
Laminate comes in many colors and patterns. You can find wood, stone, or solid color looks. Light colors make a space feel bigger and brighter. Dark colors hide stains well and look elegant. Patterns can add texture and interest without extra cost.
Thickness And Quality Options
Laminate thickness varies from thin to thick sheets. Thicker laminates are stronger and last longer. Quality also matters. Higher quality laminates resist scratches and heat better. Choose a thickness and quality that fit your kitchen use and style.
Budget Considerations
Laminate is usually cheaper than stone or wood. Prices vary by thickness, quality, and design. Setting a clear budget helps narrow your choices. Spending a bit more can mean better durability and less maintenance over time.
Tools And Materials Needed
Installing laminate countertops requires the right tools and materials. Having everything ready makes the job easier and faster. It also helps to get a smooth and professional finish. This section lists the basic tools, safety gear, and preparation materials you need.
Essential Tools List
- Measuring tape for accurate dimensions
- Carpenter’s square to keep edges straight
- Electric jigsaw for cutting laminate sheets
- Router with a laminate trimming bit
- Drill for securing screws
- Clamps to hold pieces firmly in place
- Hammer and nails for basic assembly
- Utility knife for trimming edges
- Screwdriver set for fittings
Safety Gear
- Safety goggles to protect your eyes
- Dust mask to avoid breathing sawdust
- Work gloves to protect your hands
- Ear protection if using loud power tools
Preparation Materials
- Laminate sheets of your chosen design
- Contact cement or laminate adhesive
- Sandpaper for smoothing edges
- Painter’s tape to hold laminate while gluing
- Cleaning cloth to wipe surfaces
- Wood filler for fixing any surface gaps
Preparing The Workspace
Preparing the workspace is a key step before installing laminate countertops. It helps make the process smooth and safe. A clean and organized area reduces mistakes and speeds up the work. Follow these steps to get your space ready and ensure a good fit for your new countertops.
Clearing And Cleaning The Area
Start by removing all items from the countertop and nearby cabinets. This gives you full access to the workspace. Clean the surface thoroughly to remove dust, grease, and debris. A clean area helps the new laminate stick better and prevents damage. Use a damp cloth and mild cleaner for best results.
Measuring And Marking
Measure the countertop space carefully using a tape measure. Write down the dimensions and double-check them. Mark the cutting lines on the laminate sheet with a pencil. Accurate measurements and markings are vital for a perfect fit. Take your time to avoid costly mistakes.
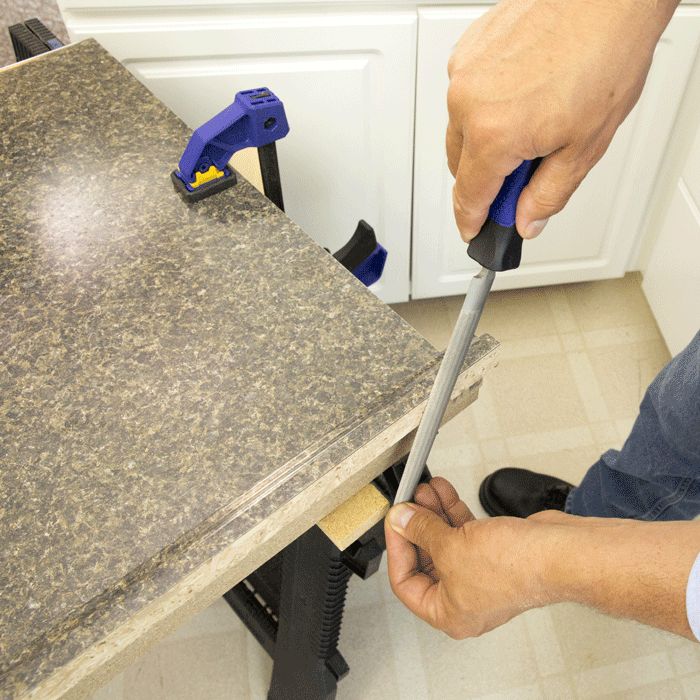
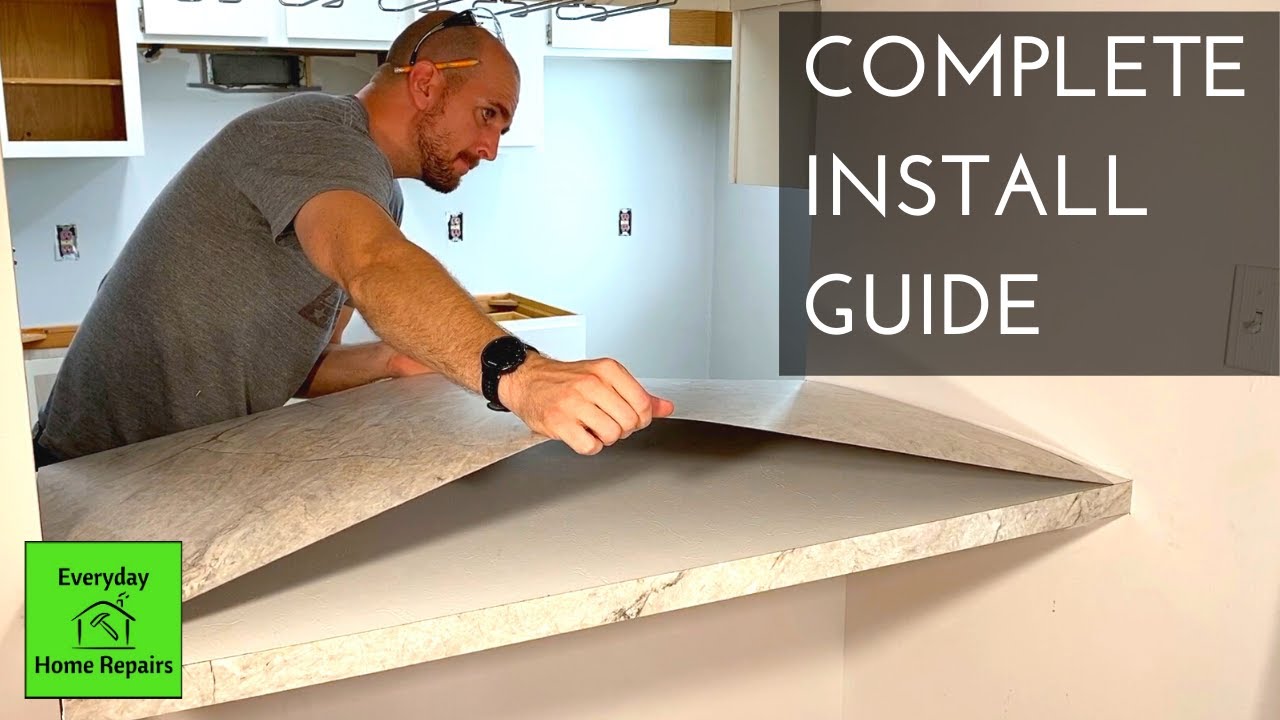
Removing Old Countertops
Check how the old countertop is attached. It may be screwed or glued down. Use a screwdriver or pry bar to gently lift it off. Take care to avoid damaging the cabinets underneath. Removing the old surface clears the way for your new laminate countertop.
Credit: www.youtube.com
Cutting The Laminate
Cutting laminate countertops is a key step in installation. It shapes the material to fit your kitchen perfectly. Accuracy is crucial to avoid mistakes and waste. Proper cutting ensures smooth edges and a professional look. This section covers essential tips for cutting laminate safely and precisely.
Measuring For Precise Cuts
Start by measuring the countertop space carefully. Use a tape measure for exact dimensions. Mark the laminate sheet with a pencil or fine marker. Double-check all measurements before cutting. Precise marks guide straight, clean cuts and prevent errors.
Using The Right Saw
A circular saw with a fine-tooth blade works best. It cuts laminate cleanly and reduces chipping. Use painter’s tape on the cut line to protect edges. Cut slowly and steadily to keep control. A jigsaw can help with curves but is less precise.
Handling Curves And Edges
Curves need special care and patience. Mark the shape clearly before cutting. Use a jigsaw with a fine blade for smooth curves. Sand edges lightly to remove rough spots. Rounded edges give a polished, finished look to your countertop.
Applying Adhesive
Applying adhesive is a key step in laminate countertop installation. It holds the laminate firmly to the base, ensuring durability and a smooth finish. Proper adhesive use prevents gaps, bubbles, and peeling later on.
Careful application creates a strong bond. It also helps the countertop look neat and professional. Follow simple steps to apply adhesive correctly for best results.
Choosing The Best Adhesive
Select an adhesive made for laminate surfaces. Contact cement is a common choice. It sticks well and dries fast. Water-based adhesives work too, especially for indoor use. Check the product label for compatibility with your countertop materials. Avoid adhesives that take too long to dry or are hard to clean.
Spreading Techniques
Use a notched trowel or roller to spread adhesive evenly. Apply a thin, uniform layer across the entire surface. Cover the edges carefully to prevent lifting. Do not leave thick glue spots; they cause lumps. Let the adhesive dry slightly until it feels tacky before placing laminate on top.
Avoiding Common Mistakes
Do not rush the drying time. Wet adhesive can cause the laminate to slip. Avoid using too much glue; it creates bumps. Skip leaving gaps in coverage; this leads to weak spots. Always clean tools right after use to stop the glue from hardening on them.
Credit: www.familyhandyman.com
Installing The Laminate
Installing laminate countertops requires careful steps to ensure a smooth, lasting surface. Proper placement and secure attachment matter most. This section breaks down the key parts of installing laminate sheets.
Aligning Laminate Sheets
Start by laying the laminate sheets flat on the countertop base. Check the edges and corners to match perfectly. Make sure the design flows naturally across the surface. Align the sheet so it covers all areas evenly. Use clamps or weights to hold the sheets in place during the next steps.
Pressing And Securing
Apply a strong adhesive to the countertop base before placing the laminate. Press the laminate sheet firmly to remove air bubbles. Use a roller or flat tool to press the sheet evenly. Secure the edges with clamps until the adhesive dries. This step keeps the laminate tight and prevents lifting.
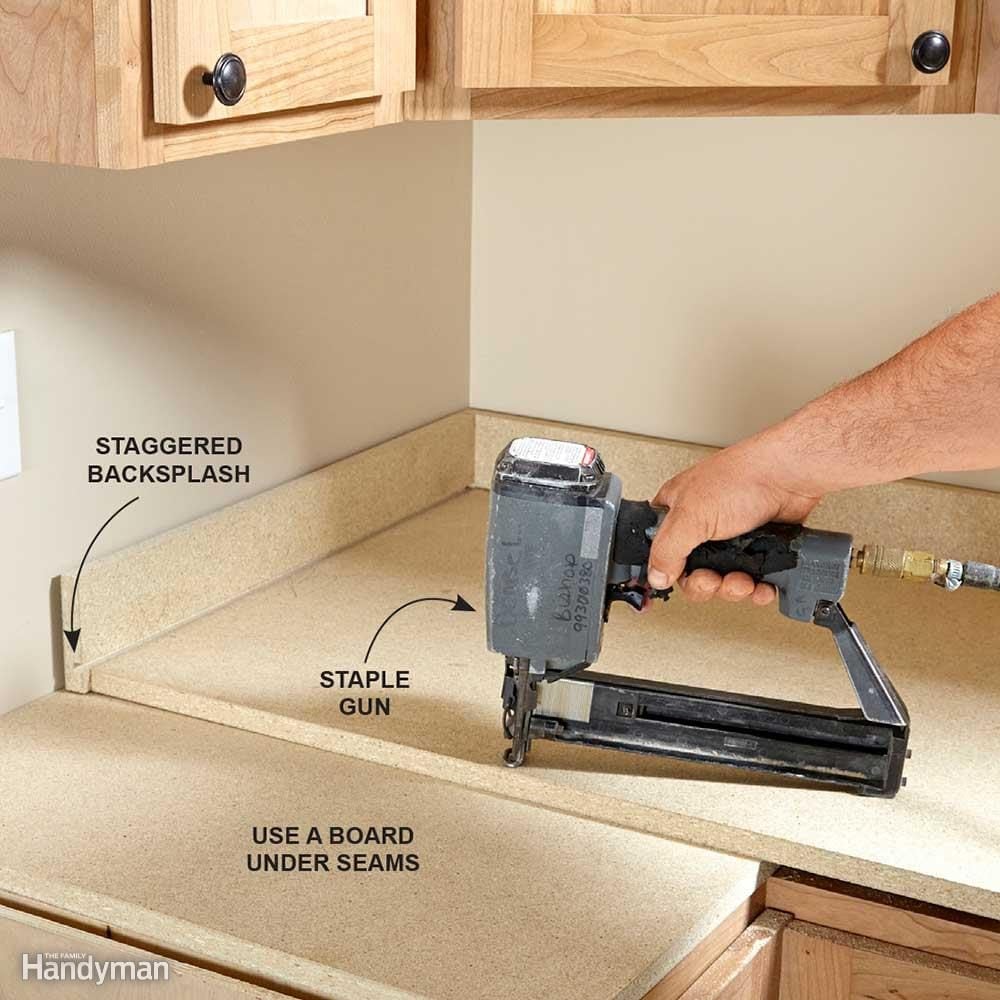
Dealing With Seams
Seams appear where two laminate sheets meet. Position seams carefully to avoid awkward lines. Use a seam roller to press the edges tightly together. Fill gaps with laminate seam adhesive for a smooth finish. Sand lightly if needed for an even surface. Proper seam work keeps the countertop looking clean and seamless.
Finishing Touches
Finishing touches complete the look of your laminate countertops. They ensure a smooth, professional appearance. Careful attention to these details helps protect your counters. Small steps create a big difference in durability and style.
Trimming Excess Material
Remove any extra laminate sticking beyond the edges. Use a sharp utility knife or laminate trimmer. Cut slowly to avoid damaging the surface. Clean edges make the countertop look neat and well-fitted. Proper trimming prevents chips and rough spots over time.
Sealing Edges
Apply a good sealant along the seams and edges. Sealant stops water from seeping under the laminate. Choose a waterproof, clear sealant for best results. Smooth the sealant evenly with a small brush or finger. Sealing protects your countertop from stains and swelling.
Polishing For Shine
Polish the countertop surface to enhance its shine. Use a soft cloth and a mild polish made for laminate. Buff in small circles to avoid streaks. Polishing restores the countertop’s smooth finish. It makes your kitchen look clean and fresh.
Maintaining Laminate Countertops
Maintaining laminate countertops keeps them looking new and lasting longer. These surfaces resist stains and wear but need simple care. Regular cleaning and careful use protect their shine and durability.
Cleaning Tips
Use a soft cloth and mild soap for daily cleaning. Avoid abrasive cleaners that can scratch the surface. Wipe spills quickly to stop stains from setting. Warm water and gentle detergent work best for tough spots. Dry with a clean towel to prevent water marks.
Preventing Damage
Use cutting boards to avoid knife marks. Avoid placing hot pots directly on the countertop. Use trivets or heat pads for hot items. Do not drag heavy objects across the surface. Keep sharp tools away to prevent chips and dents.
Repairing Minor Scratches
Light scratches can be fixed with a laminate repair paste. Match the paste color to your countertop shade. Apply gently with a soft cloth and smooth it out. Let it dry completely before using the surface again. For deeper scratches, consider professional repair services.
Frequently Asked Questions
What Tools Are Needed For Laminate Countertop Installation?
Basic tools include a tape measure, jigsaw, drill, and clamps. A router helps create smooth edges. Safety gear like gloves and goggles is essential.
How Long Does Laminate Countertop Installation Usually Take?
Installation typically takes one to two days. Time depends on countertop size and skill level. Proper preparation speeds up the process.
Can I Install Laminate Countertops Over Existing Surfaces?
Yes, laminate can go over smooth, sturdy surfaces like wood or old countertops. Uneven surfaces should be leveled first. This saves time and cost.
How Do I Maintain And Clean Laminate Countertops?
Use mild soap and a soft cloth for daily cleaning. Avoid harsh chemicals and abrasive pads. Wipe spills quickly to prevent damage.
Final Words
Laminate countertops offer a cost-effective and stylish kitchen upgrade. Installation is simple with the right tools and careful steps. Measuring and cutting accurately helps avoid mistakes. Clean surfaces ensure strong adhesion and a smooth finish. Choosing laminate means easy maintenance and many design options.
This makes it a popular choice for many homes. A well-installed countertop can last for years. Enjoy a fresh, new look without spending too much. Try laminate countertops to refresh your space today.