If you’re planning to install luxury vinyl plank (LVP) flooring, one key step can make all the difference in how professional your floor looks: staggering the planks. But what does it mean to stagger LVP flooring, and why is it so important for durability and style?
In this guide, you’ll discover simple, effective techniques to stagger your planks like a pro. By the end, you’ll feel confident creating a floor that not only lasts longer but also catches every eye in the room. Ready to transform your space with a flawless finish?
Let’s dive in!

Credit: todayshomeowner.com
Benefits Of Staggering Lvp Flooring
Staggering LVP flooring offers several key benefits that improve both look and function. It creates a natural, attractive pattern that enhances any room. The technique also adds strength to the floor, making it last longer. Waste is reduced, saving money and materials. The seams become less visible, giving the floor a smooth finish.
Enhanced Visual Appeal
Staggering planks avoids uniform lines that look artificial. It creates a natural wood pattern that feels warm and inviting. This random placement adds depth and texture to the floor’s surface. The result is a beautiful, professional appearance that fits many décor styles.
Improved Structural Stability
Staggered joints spread out stress across the floor. This reduces the chance of cracks or gaps forming over time. Each plank supports the others, creating a stronger surface. The floor holds up better under heavy foot traffic and furniture weight.
Minimized Waste And Seam Visibility
Staggering helps use offcuts from one row in the next. This lowers waste and saves money on extra planks. It also breaks up seams, making them harder to see. The floor looks seamless and smooth, increasing overall quality.
Credit: www.rejuvenationfd.com
Tools And Materials Needed
Staggering LVP (Luxury Vinyl Plank) flooring needs specific tools and materials. These help you create a strong, beautiful floor with a natural look. Prepare everything before you start. This saves time and reduces mistakes.
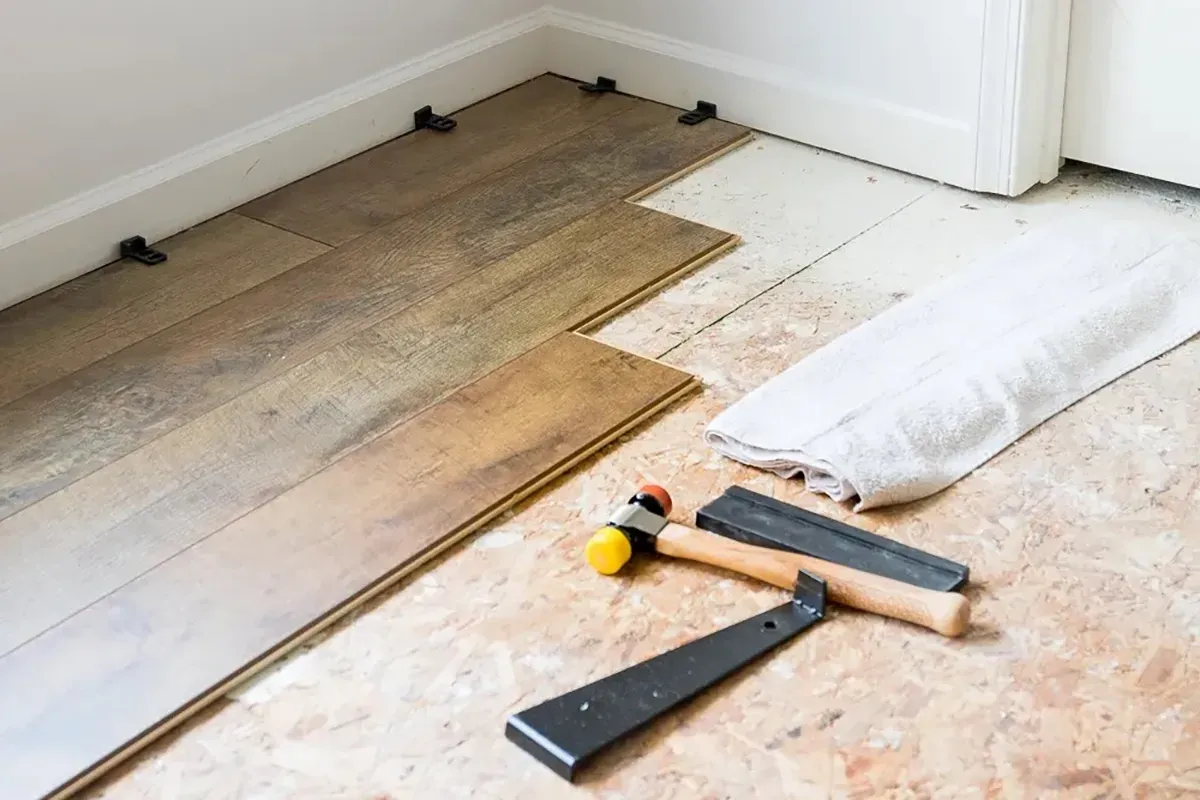
Essential Installation Tools
You need a tape measure to get exact plank sizes. A utility knife works for cutting planks cleanly. Use a tapping block to fit planks tightly without damage. A rubber mallet helps tap planks gently. A straight edge or square keeps cuts straight. A pencil marks cut lines clearly. A spacers set keeps expansion gaps around edges.
Choosing The Right Lvp Planks
Pick planks that fit your room style and size. Choose planks with click-lock edges for easy fitting. Look for textured surfaces for a natural feel. Check plank thickness for durability. Buy extra planks for mistakes and future repairs. Match plank colors and patterns for a smooth look.
Safety Gear
Wear safety glasses to protect your eyes from dust. Use gloves to avoid cuts from sharp tools. A dust mask keeps you safe from fine particles. Knee pads make working on floors more comfortable. Keep your workspace clean to prevent slips and trips.
Preparing The Subfloor
Preparing the subfloor is a key step before installing luxury vinyl plank (LVP) flooring. A clean, level, and dry surface helps the planks fit well and last longer. Taking time to prepare the subfloor prevents future problems like uneven wear or lifting.
Cleaning And Leveling
Start by removing all debris, dust, and old adhesive from the subfloor. Use a broom or vacuum to clean thoroughly. A smooth surface helps LVP lay flat and stick properly.
Check for any bumps or dips. Sand down high spots and fill low areas with a leveling compound. Wait until the compound dries fully before moving on.
Moisture Testing
Moisture can damage LVP flooring. Test the subfloor moisture with a reliable meter. This step is crucial for concrete and wood subfloors.
If moisture levels are too high, use a vapor barrier or sealant. Dry subfloors prevent warping and mold growth under the flooring.
Addressing Imperfections
Look closely for cracks, holes, or loose boards. Repair cracks with a patching compound and secure any loose boards.
Imperfections cause uneven wear and can damage the planks over time. Fixing these issues creates a stable base for your flooring.
Planning Your Layout
Planning your layout is a key step before installing luxury vinyl plank (LVP) flooring. It helps ensure your floor looks balanced and professional. A good plan reduces waste and saves time during installation.
Take your time to measure the room carefully. Know exactly where to start. Decide how to stagger the planks for a natural look. These steps make the process smoother and the result better.
Measuring The Room
Start by measuring the length and width of your room. Use a tape measure for accuracy. Write down the measurements. Check for any odd shapes or corners. Knowing the exact size helps you buy the right amount of flooring.
Measure twice to avoid mistakes. Include doorways and closets. This step prevents surprises during installation.
Determining Starting Point
Choose a starting wall. Usually, start along the longest, straightest wall. This keeps the planks aligned and neat. Avoid starting near doorways or uneven walls. A good starting point ensures a smooth layout and reduces trimming.
Mark the starting line with a pencil or chalk. This guide keeps your rows straight as you work.
Creating A Staggering Pattern
Staggering means offsetting the plank ends in each row. This avoids a uniform, grid-like look. A common method is to start the second row with a plank cut to a different length. Keep at least a 6-inch offset between seams.
Plan the pattern before you begin. Mix plank lengths to create a natural flow. This pattern adds strength and beauty to your floor.
Staggering Techniques
Staggering techniques help create a natural look for LVP flooring. They prevent long, straight lines that can make floors look fake or boring. Using the right stagger pattern adds strength and visual interest. Here are some easy ways to stagger your luxury vinyl plank flooring.
Random Staggering
Random staggering means placing planks in no fixed order. Each row starts with a different plank length. This method avoids repeating patterns and looks very natural. It is simple and quick to do. Random staggering breaks up joints and makes the floor appear seamless.
Half-lap Staggering
Half-lap staggering lines up the planks so each joint falls in the middle of the plank below. This creates a strong, brick-like pattern. It helps spread weight evenly across the floor. Half-lap staggering is easy to follow and adds a classic style. It prevents weak spots and increases floor durability.
Custom Stagger Patterns
Custom stagger patterns let you design your own plank layout. You can mix plank lengths and joint placements for a unique look. This method works well in large rooms or open spaces. Planning the pattern before installation saves time and reduces waste. Custom patterns add personality and style to your flooring.
Step-by-step Installation Process
Installing luxury vinyl plank (LVP) flooring requires careful planning. Staggering the planks properly helps create a strong, natural look. The process is simple if you follow clear steps. This guide breaks down the installation into easy parts.
Laying The First Row
Start by placing the first row of planks along the longest wall. Use spacers to keep a small gap between the planks and the wall. This gap allows the floor to expand. Make sure the first row is straight and secure. Tap the planks gently to lock them in place.
Aligning Subsequent Rows
Begin the second row by cutting the first plank to create a staggered effect. This step adds strength and looks natural. Align the planks so the seams do not line up with the row before. Lock each plank tightly by clicking or tapping them into place. Check for gaps and adjust if needed.
Cutting And Fitting Planks
Measure planks carefully before cutting. Use a utility knife or saw for clean cuts. Fit planks around door frames and corners by trimming them to size. Keep the expansion gap at the edges. Take your time to ensure each plank fits snugly. Proper cutting and fitting create a neat, professional finish.
Common Mistakes To Avoid
Staggering LVP flooring is important for a strong, natural look. Many beginners make common mistakes that hurt the floor’s appearance and durability. Avoid these errors to keep your floor looking great for years.
Ignoring Expansion Gaps
Expansion gaps allow the floor to move with temperature changes. Without gaps, planks can buckle or warp. Always leave a small space around walls and fixed objects. Use spacers during installation to keep gaps even. Ignoring this step leads to costly repairs later.
Improper Stagger Length
The stagger length is the distance between plank ends in adjacent rows. Too short or too long stagger creates weak joints and an unnatural look. Aim for a stagger length of 6 to 12 inches. This adds strength and a balanced pattern. Avoid repeating end joints in a straight line.
Skipping Subfloor Preparation
A clean, level subfloor is key before laying LVP flooring. Dirt, bumps, or moisture cause uneven planks or damage. Remove debris and fix any uneven spots. Check for moisture and use a moisture barrier if needed. Skipping this step shortens the floor’s lifespan and causes problems.
Maintenance Tips For Longevity
Taking care of your LVP flooring helps it stay beautiful for many years. Good maintenance keeps the floor strong and clean. Small actions each day add up to big results over time.
Learn simple ways to clean, protect, and fix your LVP floor. These tips save you money and keep your home looking fresh.
Cleaning Best Practices
Sweep or vacuum your floor often to remove dust and dirt. Use a soft broom or vacuum with a hard floor setting. Mop with a damp cloth or mop. Avoid soaking the floor with water. Use a cleaner made for vinyl floors only. Harsh chemicals can damage the surface.
Preventing Damage
Place felt pads under furniture legs to stop scratches. Avoid dragging heavy items across the floor. Use rugs in high traffic areas to protect the floor. Keep pet nails trimmed to reduce scratches. Clean spills quickly to avoid stains and warping. Avoid walking on the floor with sharp or heavy shoes.
Repairing Minor Issues
Small scratches can be fixed with a vinyl floor repair kit. Match the color to your floor for the best look. For dents, try placing a damp cloth and ironing gently. Loose planks can be glued back down carefully. Replace damaged planks if repairs do not work. Regular checks help catch problems early before they get worse.

Credit: www.wikihow.com
Frequently Asked Questions
What Is The Best Stagger Pattern For Lvp Flooring?
The best stagger pattern offsets each plank by about 6 to 12 inches. This creates a natural look and adds floor strength. Avoid lining up plank seams in adjacent rows.
Why Should Lvp Flooring Be Staggered During Installation?
Staggering LVP flooring prevents weak spots where planks meet. It also improves the floor’s stability and visual appeal. This method mimics real wood floor patterns.
How Far Should I Stagger The Seams Of Lvp Planks?
Seams should be staggered at least 6 inches apart. This spacing reduces the chance of gaps or cracks forming. It keeps the floor strong and lasting longer.
Can I Stagger Lvp Flooring Randomly Or Follow A Pattern?
Following a consistent stagger pattern is better than random placement. It ensures the floor looks balanced and stable. Random staggering can cause uneven gaps or weak points.
Final Words
Staggering LVP flooring adds strength and style to any room. It helps avoid weak spots and creates a natural look. Keep the gaps random but balanced for best results. Measure carefully and plan before laying each plank. This method makes your floor last longer and look better.
Enjoy a neat, professional finish with simple steps. Your hard work will clearly show in the final floor. Happy flooring!