Are you ready to transform your space with a beautiful hardwood floor you made yourself? Imagine the pride of walking on floors you crafted with your own hands—warm, sturdy, and uniquely yours.
This guide will show you simple, clear steps to make your own hardwood floor, even if you’ve never done it before. By the end, you’ll have the confidence and know-how to create a stunning floor that lasts for years. Keep reading, and let’s turn your flooring dreams into reality.
Credit: toolstoday.com
Choosing The Right Hardwood
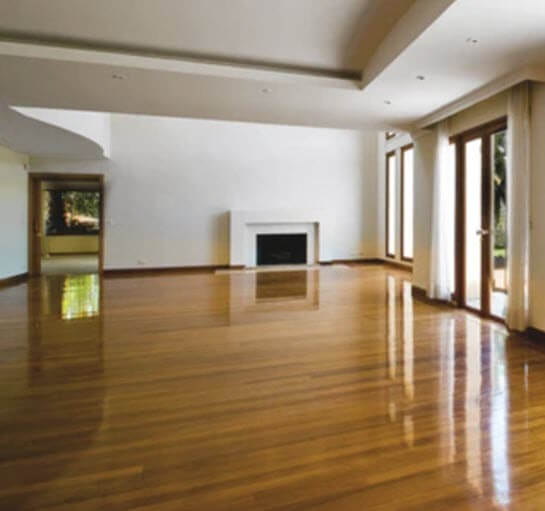
Choosing the right hardwood is key to making a beautiful floor. The type of wood affects how the floor looks and lasts. Picking the best wood depends on your style and how much wear the floor will face. Consider color, grain, and strength to find the perfect match for your home.
Types Of Hardwood
Hardwood comes from many trees. Oak, maple, and cherry are popular choices. Oak is classic and easy to find. Maple has a smooth, clean look. Cherry offers warm, rich tones. Each type has unique features. Choose wood that fits your home’s style and budget.
Durability And Hardness
Hardwood floors must stand up to daily use. Some woods are harder and last longer. Hickory and oak score high on hardness tests. Soft woods like pine scratch more easily. Choose harder wood for busy areas. This keeps your floor looking good over time.
Color And Grain Patterns
Wood color varies from light to dark. Grain patterns add texture and character. Some woods have straight grains, others swirl or knot. Light colors make rooms look bigger. Dark woods create a cozy feel. Pick color and grain that match your decor and mood.
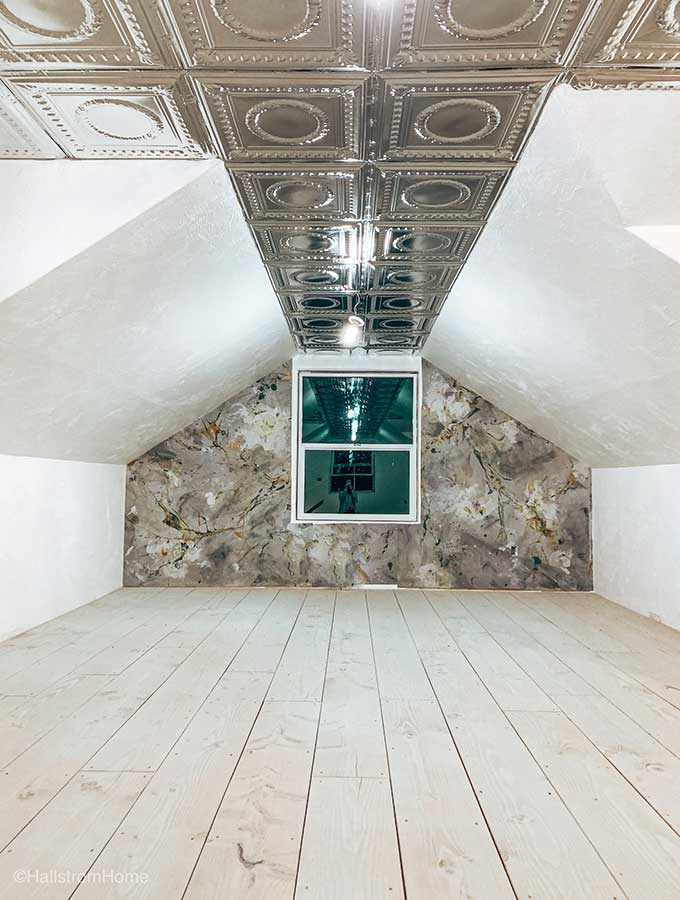
Credit: www.hallstromhome.com
Preparing The Subfloor
Preparing the subfloor is a key step before installing hardwood floors. It creates a strong base for the wood. This step ensures the floor stays flat and lasts long. Proper preparation stops problems like squeaks and gaps.
Cleaning And Repairing
Start by cleaning the subfloor thoroughly. Remove dust, dirt, and old adhesive. Sweep and vacuum the area well. Check for nails or screws sticking out. Hammer or remove them to avoid damage.
Look for cracks or holes in the subfloor. Fill them with wood filler or patching compound. Let it dry completely before moving on. A smooth surface helps the hardwood fit well.
Moisture Testing
Moisture can ruin hardwood floors over time. Test the subfloor for moisture levels first. Use a moisture meter to get accurate results. High moisture means you need to fix leaks or improve ventilation.
Concrete subfloors need a vapor barrier to stop moisture. Wooden subfloors should be dry and stable. This step prevents warping and mold growth later.
Leveling The Surface
Check if the subfloor is flat and even. Use a long level or straight board to find dips or bumps. Mark uneven spots clearly. Sand down high areas and fill low spots with leveling compound.
Let the leveling material dry fully. A flat subfloor helps hardwood planks fit tightly. It prevents creaking and uneven wear on the floor.
Gathering Tools And Materials
Gathering the right tools and materials is the first step to making your own hardwood floor. This step sets the stage for a smooth and successful project. Having everything ready saves time and avoids frustration. It also helps keep the work area safe and organized.
Essential Tools
Start with a tape measure to get exact room dimensions. A saw is needed to cut the hardwood planks to size. A hammer helps to secure nails or fasteners. Use a pry bar to remove old flooring or adjust planks. A rubber mallet is useful for fitting boards without damage. Lastly, a level ensures the floor is flat and even.
Selecting Fasteners And Adhesives
Choose nails or staples made for hardwood flooring. They hold planks tightly in place. Use adhesive designed for wood floors to prevent movement and gaps. Check that the glue is non-toxic and easy to clean up. The right fasteners and glue improve the floor’s durability and appearance.
Safety Gear
Wear safety glasses to protect your eyes from dust and splinters. Use ear protection to avoid loud noise from cutting tools. Gloves keep your hands safe from sharp edges and splinters. A dust mask helps to breathe clean air during sanding and cutting. Safety gear is key to a safe and comfortable work environment.

Credit: www.grandmashousediy.com
Measuring And Planning Layout
Measuring and planning the layout is the first step in installing hardwood floors. Precise measurements help you buy the right amount of wood. Planning the layout ensures a neat, balanced look. This process saves time and money during installation. It also reduces waste and helps avoid mistakes.
Calculating Flooring Area
Measure the length and width of the room in feet. Multiply these numbers to get the total square feet. For irregular rooms, divide the area into smaller rectangles. Measure each part separately and add them together. Always buy 10% more wood than the total area. This extra wood covers cuts and mistakes.
Designing Patterns
Choose a pattern that fits your room’s style. Straight planks offer a classic look and are easy to install. Herringbone and chevron patterns add elegance but need careful planning. Sketch the layout on paper or use design software. Consider plank direction and how light enters the room. Plan where the first row will start for a balanced look.
Acclimating Hardwood
Hardwood wood changes size with temperature and humidity. Let the wood sit in the room for 3 to 7 days before installation. This process is called acclimating. It prevents gaps or buckling after installation. Stack the planks with space between them for air flow. Keep the room temperature steady during acclimation.
Installing The Hardwood Floor
Installing a hardwood floor requires careful planning and precise work. This part of the process shapes how your floor will look and last. Follow these steps to install your hardwood floor correctly. Take your time and focus on accuracy for best results.
Starting The First Row
Begin by placing the first row of hardwood planks along the longest wall. Use spacers to keep a small gap between the wall and the floor. This gap allows for wood expansion. Make sure the first row is straight and secure. A straight first row helps keep the rest of the floor aligned.
Nailing And Gluing Techniques
Use nails to secure the hardwood planks tightly to the subfloor. Nail at an angle through the tongue of each board. This hides the nails and holds planks firmly. Apply wood glue to the edges for extra strength and stability. Combining nailing and gluing prevents gaps and movement.
Handling Difficult Areas
Cut planks carefully to fit around corners, vents, and doorways. Measure twice before cutting. Use a jigsaw or handsaw for precise cuts. Fill small gaps with wood filler matching the floor color. Take extra care in tricky spots to keep the floor looking seamless.
Sanding And Finishing
Sanding and finishing are vital steps in making your own hardwood floor. These steps protect the wood and give it a smooth, beautiful look. Proper sanding removes rough spots and old finishes. Finishing adds color and shields the floor from damage. Follow each step carefully for the best results.
Sanding For Smoothness
Start sanding with coarse grit sandpaper to remove rough areas. Move evenly across the floor to avoid dips or scratches. Use medium grit next for a finer surface. Finish with fine grit sandpaper to smooth the wood completely. Clean the dust between each sanding step. Sanding prepares the floor for the finish and improves its appearance.
Choosing Finishes
Select finishes based on floor use and desired look. Polyurethane is popular for its strong protection and shine. Oil-based finishes deepen wood color and last long. Water-based finishes dry fast and keep the wood’s natural look. Consider ease of application and drying times. Choose a finish that fits your style and floor needs.
Applying Stains And Sealants
Apply stain evenly with a brush or cloth to change wood color. Wipe off extra stain quickly to avoid dark spots. Let the stain dry completely before sealing. Use a sealant or finish to protect the stained wood. Apply thin coats, allowing each to dry well. Sand lightly between coats for a smooth surface. Proper sealing keeps the floor beautiful and durable for years.
Maintaining Your Hardwood Floor
Maintaining your hardwood floor helps keep its beauty and durability for years. Regular care protects the wood and saves money on repairs. Simple habits and quick fixes make a big difference in the floor’s lifespan.
Regular Cleaning Tips
Sweep or vacuum your hardwood floor daily. Use a soft broom or vacuum with a floor-brush attachment. Dirt and grit can scratch the surface if not removed. Mop the floor weekly using a damp mop and mild cleaner made for wood floors. Avoid soaking the floor with water. Dry the floor quickly after mopping.
Preventing Damage
Place felt pads under furniture legs to stop scratches. Avoid walking on hardwood floors with high heels or shoes with sharp soles. Use rugs or mats at entryways to catch dirt and moisture. Keep pet nails trimmed to prevent marks on the floor. Control indoor humidity to prevent wood from expanding or shrinking.
Repairing Scratches And Dents
For small scratches, use a wood touch-up marker that matches your floor color. Lightly rub the marker on the scratch and wipe away excess. For dents, place a damp cloth over the dent and apply heat with an iron. The steam helps wood fibers swell back to shape. Deep scratches or large dents may need sanding and refinishing by a professional.
Frequently Asked Questions
What Tools Do I Need To Make My Own Hardwood Floor?
You need a saw, hammer, nails, measuring tape, and a level. Sandpaper and wood finish are also important for a smooth look.
How Long Does It Take To Install Hardwood Flooring?
Installation usually takes 3 to 5 days, depending on room size. Drying time for finish may add extra days.
Can I Install Hardwood Floors Over Existing Flooring?
Yes, hardwood can go over some floors like plywood or vinyl. Make sure the surface is clean and flat before starting.
What Type Of Wood Is Best For Hardwood Floors?
Oak, maple, and cherry are popular for durability and look. Choose wood that fits your style and room use.
Conclusion
Making your own hardwood floor takes time and care. Start with good materials and tools. Follow each step carefully to avoid mistakes. Patience helps you get better results. Enjoy the process and learn as you go. Soon, your floor will look strong and beautiful.
This project can save money and add value to your home. Try it yourself and see the difference quality work makes. Hard work pays off in the end.