Installing vinyl plank flooring around your toilet might seem tricky, but it doesn’t have to be. You want your bathroom to look fresh and clean, and the right flooring can make all the difference.
If you’ve ever worried about cutting and fitting planks around tight spaces, this guide is for you. By the time you finish reading, you’ll have the confidence and clear steps to tackle this project yourself. Ready to transform your bathroom floor without the hassle?
Let’s dive in and make your vinyl plank flooring look flawless around your toilet.
Credit: fixthisbuildthat.com
Tools And Materials Needed
Installing vinyl plank flooring around a toilet needs the right tools and materials. Having everything ready makes the job easier and faster. This section lists all the essentials you will need.
Tools Required
Gather basic tools to cut and fit vinyl planks properly. A utility knife helps make clean cuts. A tape measure is key for precise measurements. Use a pencil to mark cut lines. A straight edge or ruler guides cutting. A pry bar removes old flooring or baseboards. A rubber mallet helps tap planks in place without damage. A jigsaw is useful for curved cuts around pipes. A putty knife removes debris and smooths the surface.
Materials Needed
Choose quality vinyl planks designed for bathroom use. Purchase extra planks for mistakes or future repairs. Use underlayment for a smooth base and moisture barrier. Floor adhesive or double-sided tape secures planks firmly. Sealing caulk prevents water damage around toilet base. Clean the subfloor before installation to improve adhesion. Keep cleaning supplies handy to wipe dust and dirt.
Prepare The Bathroom Floor
Preparing the bathroom floor is a key step before installing vinyl plank flooring around the toilet. Proper preparation ensures the new floor fits well and lasts longer. It also helps avoid problems like uneven surfaces or water damage.
This section covers two important tasks: removing the toilet and cleaning the floor. Both steps make the area ready for a smooth vinyl plank installation.
Remove The Toilet
Start by turning off the water supply to the toilet. Flush to empty the tank and bowl. Use a sponge to soak up any leftover water.
Disconnect the water line from the tank. Unscrew the bolts at the base of the toilet carefully. Lift the toilet straight up and set it aside on a protective surface.
Removing the toilet gives full access to the floor. It makes measuring and cutting the vinyl planks easier and more accurate.
Clean And Dry The Surface
Clear away any old wax, dirt, or debris on the floor. Use a scraper to remove wax rings or sticky residue. Sweep or vacuum dust and loose particles.
Wash the floor with a mild cleaner and warm water. Avoid soaking the floor with too much water. Let the floor dry completely before installing vinyl planks.
A clean, dry surface helps vinyl planks stick better and stay in place. It also prevents mold and damage under the flooring.
Measure And Plan The Layout
Measuring and planning the layout is the first step to install vinyl plank flooring around the toilet. This step ensures the flooring fits perfectly and looks neat. Careful planning helps avoid mistakes and wasted materials.
Start by understanding the space and how planks will fit around the toilet. Planning also helps to see where cuts are needed. This makes the installation smoother and the final look professional.
Take Accurate Measurements
Measure the bathroom floor length and width. Use a tape measure for precise numbers. Write down each measurement clearly. Measure twice to avoid errors.
Measure the distance from the wall to the toilet base. Check both sides of the toilet for any differences. Note the space behind and in front of the toilet too.
Plan Around The Toilet Area
Sketch the bathroom floor on paper. Mark the toilet’s exact position on the sketch. Use the measurements to draw the room to scale.
Plan how the planks will fit around the toilet base. Leave space for expansion as vinyl needs room to expand. Decide where to make cuts for a clean fit.
Think about the direction of the planks. Align planks with the longest wall for the best look. Plan to avoid small, narrow pieces next to the toilet.
Credit: fixthisbuildthat.com
Cut Vinyl Planks To Fit
Cutting vinyl planks to fit around a toilet is a crucial step in your flooring project. Precision ensures a clean look and prevents gaps that let water seep through. Take your time and measure carefully. Use the right tools to make smooth cuts that fit snugly around the toilet base.
Mark Cutting Lines
First, place the vinyl plank near the toilet. Use a pencil to mark the shape of the toilet base on the plank. Draw clear, straight lines to show where to cut. Double-check measurements to avoid mistakes. Marking helps guide your cuts for a precise fit.
Use Proper Cutting Techniques
Use a sharp utility knife for clean cuts. Score the plank along the marked lines. Cut slowly to avoid jagged edges. For curves around the toilet base, make small, careful cuts. Sand any rough edges lightly for a smooth finish. Proper cutting makes installation easier and the floor look professional.
Install The Vinyl Planks
Installing vinyl plank flooring around a toilet requires careful attention to detail. This step ensures a clean look and a secure fit. Follow these simple instructions to place the vinyl planks perfectly.
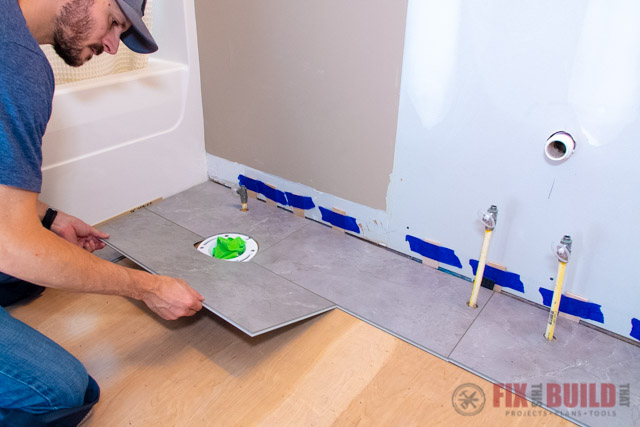
Start From The Edges
Begin laying the vinyl planks from the room edges. This helps create a straight and even pattern. Use spacers to keep a small gap between the wall and planks. This gap allows the floor to expand and prevents buckling. Cut planks to fit snugly along the walls. Make sure each plank locks tightly with the next one.
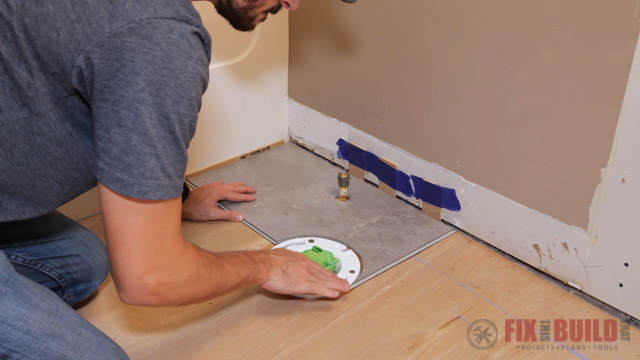
Fit Around The Toilet Flange
Measure the area around the toilet flange carefully. Mark the plank where it needs to be cut. Use a jigsaw or utility knife to make precise cuts. Cut out a small section to fit around the flange. Lay the cut plank gently in place. Check for any gaps and adjust if needed. This step ensures a smooth finish around the toilet base.
Reinstall The Toilet
Reinstalling the toilet after laying vinyl plank flooring requires care. This step ensures your toilet works well and no leaks appear. A proper reinstall keeps your bathroom clean and safe. Follow these simple steps to get it right.
Check Seal And Placement
Start by placing a new wax ring on the toilet flange. The wax ring creates a tight seal to stop leaks. Carefully lower the toilet onto the flange. Make sure the toilet aligns with the floor bolts. Press down firmly to compress the wax ring. Check that the toilet sits flat on the floor. The seal must be even all around.
Secure The Toilet Properly
Next, attach the nuts to the bolts by hand. Tighten them evenly to avoid cracking the toilet base. Use a wrench to secure the nuts firmly. Do not overtighten; this can damage the toilet. Attach the water supply line and turn on the valve. Flush the toilet and watch for leaks. Tighten connections if you see any water.
Finishing Touches
Finishing touches make your vinyl plank flooring look complete and neat around the toilet. These final steps protect the floor edges and give a polished look. Proper finishing hides any gaps and secures the flooring in place.
Add Baseboards Or Trim
Install baseboards or trim along the walls and around the toilet base. This covers the expansion gap left during installation. Choose trim that matches your flooring color for a seamless look. Nail or glue the baseboards carefully to avoid damaging the new floor. Use caulk to seal any small gaps between the trim and wall. This stops moisture from reaching the floor edges.
Clean Up And Inspect
Remove all dust and debris from the floor surface. Use a soft broom or vacuum to clean the area gently. Check the flooring edges around the toilet for any loose planks. Press down any edges that lift slightly. Clean the vinyl with a damp cloth to remove smudges or adhesive marks. Inspect the entire floor to ensure it looks smooth and even.
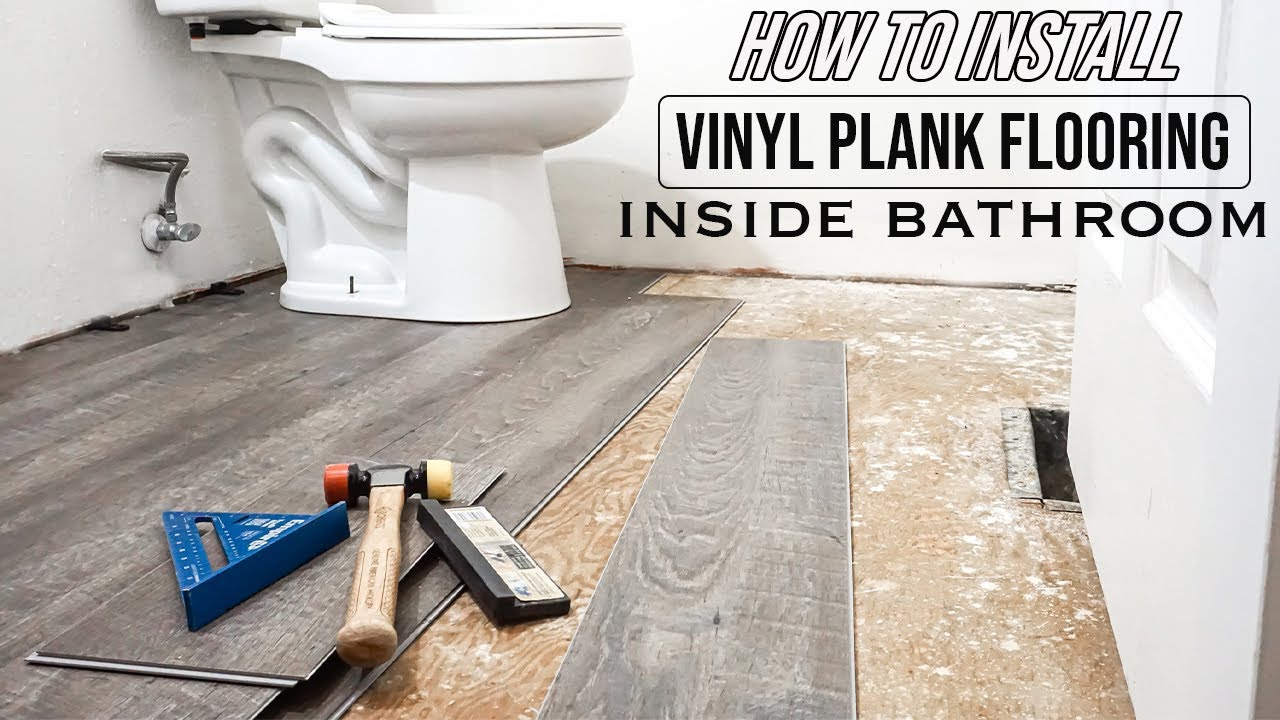
Credit: www.youtube.com
Frequently Asked Questions
How Do I Cut Vinyl Planks Around A Toilet Base?
Use a jigsaw or handsaw to cut planks carefully around the toilet base. Measure twice, cut once. Make sure the edges fit snugly without gaps.
Should I Remove The Toilet Before Installing Vinyl Flooring?
Removing the toilet makes installation easier and more precise. It prevents damage and allows better access for cutting and fitting planks.
How To Prevent Water Damage Near The Toilet On Vinyl Flooring?
Seal all seams and edges with waterproof caulk around the toilet base. Clean spills quickly to avoid water damage and mold growth.
Can I Install Vinyl Plank Flooring Over Existing Bathroom Floors?
Yes, vinyl planks can go over most existing floors if they are smooth and clean. Remove loose tiles or debris for better adhesion and a flat surface.
Final Words
Installing vinyl plank flooring around a toilet is simpler than it seems. Take your time to measure and cut carefully. Make sure the floor is clean and dry before starting. Use the right tools for precise cuts around the base.
Fit the planks snugly but avoid forcing them. This approach helps prevent damage and keeps the floor looking neat. With patience, your bathroom will have a fresh, new look. Enjoy the durability and easy maintenance of vinyl plank flooring. Small steps lead to great results.