Are you ready to transform your space with vinyl floor planks but unsure how to get the perfect fit? Cutting vinyl floor planks might seem tricky at first, but with the right tips and tools, you can achieve clean, precise cuts that make your flooring look professional.
In this guide, you’ll discover simple steps to cut your vinyl planks easily and confidently. Keep reading to learn how to save time, avoid mistakes, and get flawless results every time you work on your floor. Your dream floor is just a few cuts away!
:max_bytes(150000):strip_icc()/easy-install-plank-vinyl-flooring-1822808-07-9e82b716c3e94264b4a6084e174e9aeb.jpg)
Credit: www.thespruce.com
Tools Needed
Cutting vinyl floor planks needs the right tools. Using proper tools makes your work easier and more precise. You save time and get cleaner cuts. This section covers the basic tools you need to cut vinyl planks well and safely.
Essential Cutting Tools
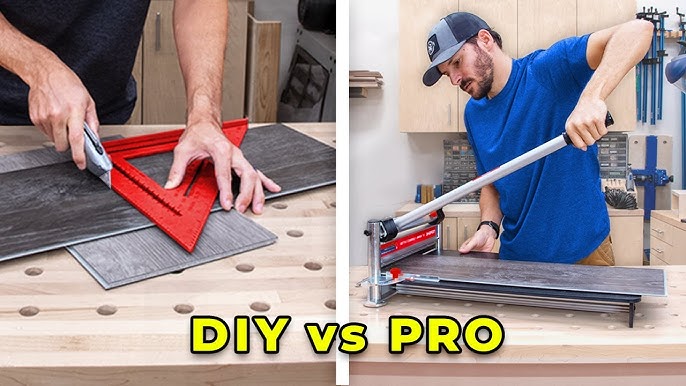
A utility knife is the main tool for cutting vinyl planks. It gives clean and straight cuts. Choose one with a sharp blade for smooth edges. A metal ruler or straight edge helps guide your cuts. It keeps lines straight and accurate. For longer cuts, a vinyl cutter or a fine-toothed saw works well. A cutting mat protects surfaces and prevents blade damage. Also, a pencil or chalk helps mark cutting lines clearly.
Safety Gear
Safety gear protects you during cutting tasks. Wear safety goggles to shield your eyes from flying debris. Gloves protect your hands from sharp blades and rough plank edges. A dust mask helps avoid inhaling small particles. Keep your workspace well lit to see cuts clearly. Proper safety gear prevents injuries and makes the job safer.

Credit: www.lowes.com
Preparing The Workspace
Preparing your workspace is the first step in cutting vinyl floor planks safely and accurately. A clean, organized area helps you work faster and avoid mistakes. Taking time to set up well improves the quality of your cuts and protects your tools and materials.
Clearing The Area
Remove all furniture and objects from the workspace. This gives you enough room to move and handle the planks easily. Sweep the floor to remove dust and debris that can affect your cutting line. A clean space helps keep the vinyl planks free of dirt and damage.
Measuring And Marking
Use a tape measure to get exact plank lengths. Measure twice to avoid errors. Mark the cutting line clearly with a pencil or a fine-tip marker. Straight, visible lines guide your cuts and ensure each plank fits perfectly. Accurate marking reduces waste and saves time.
Cutting Techniques
Cutting vinyl floor planks requires the right techniques for clean, precise edges. Different cuts suit different parts of your flooring project. Understanding these cutting methods helps you fit planks perfectly. This section explains the main cutting techniques.
Straight Cuts
Straight cuts are the easiest to make. Use a utility knife to score the plank along a ruler or straight edge. Score deeply, then snap the plank apart. This method keeps edges neat and fits well along walls or in open areas. A steady hand gives the best results.
Angle Cuts
Angle cuts help fit planks in corners or around doorways. Mark the angle on the plank before cutting. Use a miter box or a bevel gauge to guide your saw. Cut slowly to avoid splintering. Angle cuts allow planks to align smoothly with adjoining surfaces.
Cutting Around Obstacles
Obstacles like pipes or door frames need careful cutting. Measure the obstacle’s size and mark the plank clearly. Use a jigsaw or a coping saw to cut curves or small shapes. Take your time to make precise cuts. This technique keeps your flooring neat and professional.
Tips For Accurace
Cutting vinyl floor planks requires focus and care. Accuracy is key to a neat finish.
Small mistakes can cause waste and uneven edges. Follow these tips to improve your cutting precision.
Using A Straightedge
A straightedge helps guide your cuts. Place it firmly on the plank.
Use a pencil to mark where you want to cut. Align the straightedge with the marks.
Hold it tight to avoid slipping. This ensures a clean, straight line every time.
Scoring Vs. Sawing
Scoring means lightly cutting the surface with a sharp blade. Then, snap the plank along the score.
This method works well for thin vinyl planks. It creates less dust and noise.
Sawing uses a fine-tooth saw for thicker or tougher planks. It gives a smoother edge but needs more care.
Choose the method based on plank thickness and your tools. Both need steady hands for best results.
Handling And Installing Cut Planks
Handling and installing cut vinyl floor planks requires care and attention. Proper handling ensures the planks stay in good shape. Careful installation helps create a smooth, even floor. Follow steps to fit and secure each piece well.
Fitting Pieces Together
Place the cut plank close to its spot. Align the edges with the adjacent planks. Use gentle pressure to snap them tightly together. Check for gaps between the planks. Adjust the position to make the fit perfect. Keep the surface level and smooth. Avoid forcing the planks as this may cause damage.
Securing The Planks
Once fitted, press down firmly on each plank. This helps the adhesive or locking system hold better. Use a rubber mallet to tap the edges gently if needed. Make sure every plank locks tightly into place. Clean off any dust or debris before securing. This prevents weak spots in the flooring. Proper securing keeps the floor stable and durable.
Credit: www.youtube.com
Common Mistakes To Avoid
Cutting vinyl floor planks requires care and attention. Mistakes can cause wasted materials and poor results. Avoid common errors to save time and money. Focus on accuracy and the right tools for best outcomes.
Incorrect Measurements
Measuring vinyl planks wrong leads to gaps or overlaps. Double-check measurements before cutting. Mark the plank clearly using a pencil or chalk. Measure twice, cut once to avoid errors. Avoid guessing sizes or relying on rough estimates.
Improper Tool Use
Using the wrong tools can damage planks or cause injury. Use a sharp utility knife or vinyl cutter for clean cuts. Avoid dull blades that tear or crack the material. Cut on a stable surface to keep control. Follow safety guidelines to protect your hands and fingers.
Frequently Asked Questions
How Do I Measure Vinyl Floor Planks For Cutting?
Measure the area where the plank will fit carefully. Mark the plank using a pencil and a ruler for straight cuts.
What Tools Are Best For Cutting Vinyl Floor Planks?
A utility knife or vinyl cutter works well. For straight cuts, use a straight edge as a guide.
How Can I Make A Clean Cut On Vinyl Planks?
Score the plank deeply with a sharp knife. Then snap the plank along the scored line for a clean edge.
Can I Cut Vinyl Floor Planks Around Corners Or Curves?
Yes, use a jigsaw or fine-tooth saw for curves. Take your time to follow the marked line closely.
Final Words
Cutting vinyl floor planks does not have to be hard. With the right tools and careful measuring, you can do it yourself. Take your time and follow each step clearly. Clean cuts make your floor look neat and fit well.
Practice on a scrap piece before cutting the final plank. This will help you feel confident and avoid mistakes. Keep safety in mind and work slowly. Soon, your floor will look great and you will feel proud of your work.
Simple steps lead to good results.