Are you dreaming of wood floors that look so perfect, they catch everyone’s eye the moment they enter your home? Achieving flawless wood floors isn’t as hard as you might think.
With the right tips and simple steps, you can transform your floors into a stunning feature that adds warmth and style to any room. Whether you’re starting fresh or fixing up worn-out boards, this guide will help you get the smooth, shiny finish you want.
Keep reading to discover easy, effective ways to make your wood floors truly flawless—your home deserves it.
Choosing The Right Wood
Choosing the right wood is key to flawless wood floors. The wood type affects durability, look, and cost. It also shapes the room’s style and feel.
Different woods offer unique qualities. Some resist dents well, while others show natural beauty. Knowing these options helps pick the best wood for any space.
Hardwood Vs. Softwood
Hardwood comes from trees that lose leaves each year. Oak, maple, and cherry are common hardwoods. They tend to be strong and last long.
Softwood comes from evergreen trees. Pine and cedar are softwoods. These woods are easier to dent but often cost less.
Hardwood suits high-traffic areas. Softwood works well in low-traffic rooms or rustic designs.
Popular Wood Species
Oak is a top choice. It is tough and has a classic look. Maple is smooth and light, with a modern feel. Cherry darkens over time for rich color.
Walnut offers deep, warm tones. Hickory is very hard and shows strong grain patterns. Pine gives a warm, casual look but scratches easier.
Sustainable Options
Eco-friendly wood helps protect forests. Bamboo grows fast and renews quickly. It is strong and looks like hardwood.
Reclaimed wood uses old wood from buildings. It adds character and reduces waste. Look for certifications like FSC to ensure wood is responsibly sourced.
Choosing sustainable wood keeps floors beautiful and helps the planet.
Credit: mrsander.co.uk
Preparing The Subfloor
Preparing the subfloor is the first step to flawless wood floors. It creates a smooth, strong base for the wood. A well-prepared subfloor prevents future problems like warping or squeaking. This step saves time and money later.
Cleaning And Leveling
Start by cleaning the subfloor. Remove dust, dirt, and debris. A clean surface helps the wood stick better. Next, check for uneven spots. Use a leveling compound to fill low areas. Sand down high spots. A flat surface ensures the wood lays evenly.
Moisture Testing
Moisture can ruin wood floors. Test the subfloor with a moisture meter. Wood needs dry conditions to stay strong. If moisture is high, wait or fix the source. Dry floors prevent mold and wood damage. Always test before installation.
Repairing Damages
Look for cracks, holes, or soft spots. Fix small cracks with wood filler. Replace damaged sections if needed. Soft spots may mean rot and require removal. A sturdy subfloor supports the wood properly. Ignoring damage leads to bigger issues later.
Installation Techniques
Installing wood floors correctly is key to a smooth and beautiful finish. The right techniques prevent damage and ensure the floor lasts long. Understanding installation methods helps you avoid common mistakes. This section covers essential tips for flawless wood floor installation.
Nailing Vs. Glueing
Nailing wood floors uses nails or staples to fix planks to the subfloor. This method allows the wood to expand and contract naturally. It works well for solid hardwood floors. Glueing involves spreading adhesive on the subfloor and pressing planks down. Glueing creates a strong bond and reduces noise. It suits engineered wood floors better. Each method has benefits depending on wood type and room conditions.
Proper Spacing
Wood expands and contracts with temperature and humidity changes. Leaving space between planks and walls allows room for movement. Typically, a ¼ inch gap around edges is ideal. Without proper spacing, floors can buckle or warp. Use spacers during installation to keep consistent gaps. Cover gaps later with baseboards or molding for a clean look.
Acclimating Wood
Wood should adjust to the room’s climate before installation. Store planks in the installation area for at least 3 days. This process reduces moisture differences between wood and subfloor. Acclimated wood is less likely to shrink or expand after installation. It helps keep floors flat and stable over time.

Credit: www.brothers-floorcovering.com
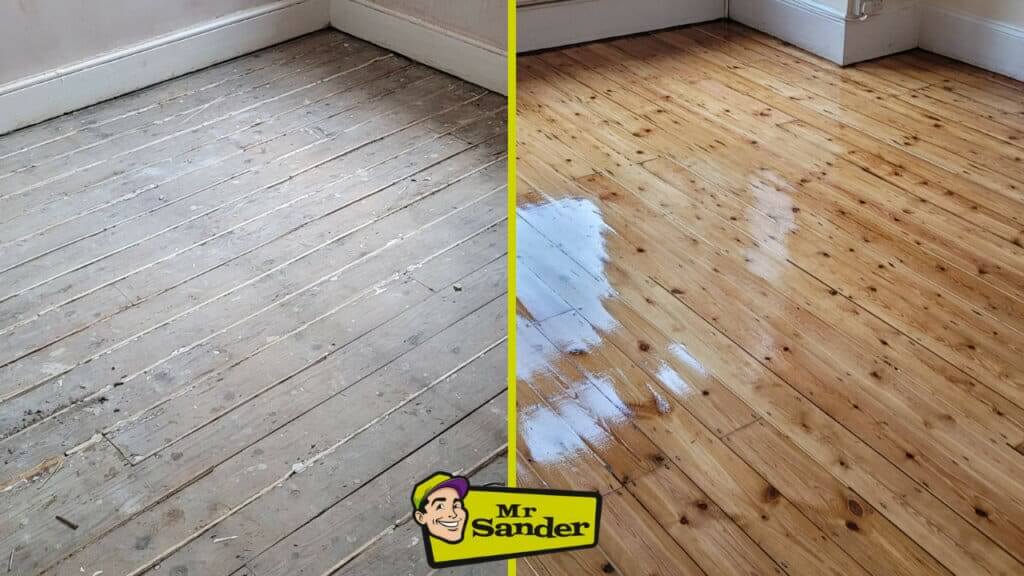
Sanding For Smoothness
Sanding is a key step to achieve smooth and flawless wood floors. It removes old finish, scratches, and uneven spots. Proper sanding creates a clean surface that accepts stain and finish well. The right sanding technique makes your floors look polished and professional.
Each step of sanding matters. Choosing the right grit, following correct sanding patterns, and managing dust all affect the final result. Careful sanding ensures a beautiful floor that lasts for years.
Choosing The Right Grit
Start sanding with coarse grit sandpaper. It removes old finish and deep scratches fast. Use 36 to 60 grit for the first pass. Then switch to medium grit, like 80 to 100, to smooth the surface. Finish with fine grit, 120 to 150, for a silky feel. Do not skip grits. Move gradually to avoid scratches and rough patches.
Sanding Patterns
Sanding in the right direction helps avoid marks. Always sand along the wood grain. Cross-grain sanding can cause scratches that show later. Use long, even strokes with a floor sander. Overlap passes slightly to cover the entire floor. For edges, use an edge sander carefully. Keep the sander moving to prevent gouges.
Dust Management
Sanding creates lots of dust. Dust can settle on the floor and spoil the finish. Use a vacuum with a sanding machine. Clean the floor often during sanding. Wear a mask to protect your lungs. After sanding, wipe the floor with a damp cloth. A clean surface helps the stain and finish stick better.
Staining And Finishing
Staining and finishing wood floors is a key step to make them look beautiful and last longer. This process changes the floor’s color and protects it from damage. A good stain brings out the wood’s natural patterns, while the finish guards against scratches and spills.
Choosing the right stain and sealant helps create a flawless floor that fits your style. Proper application and drying times ensure a smooth, even surface. Let’s explore these important parts.
Selecting Stain Colors
Choose a stain that matches your room’s style and lighting. Light stains make rooms feel bigger and brighter. Dark stains add warmth and depth but may show dust more. Test a small spot first to see the true color on your wood. Pick a shade that highlights the wood grain for a natural look.
Applying Sealants
Sealants protect the stained wood from wear and tear. Use a clear finish to keep the stain visible. Polyurethane is popular for its durability. Apply thin, even coats with a brush or roller. Let each coat dry before adding the next. Avoid thick layers to prevent bubbles or uneven spots.
Drying Times And Curing
Drying time varies by product and room conditions. Usually, it takes 4 to 6 hours to dry between coats. Full curing can take several days up to a week. Avoid heavy foot traffic until the floor is fully cured. Proper drying and curing ensure a strong, long-lasting finish.
Credit: villagiowoodfloors.com
Maintenance Tips
Maintaining wood floors keeps them beautiful and lasts longer. Simple daily habits protect your floors from damage. Regular care stops small problems from becoming big issues. Here are key tips to keep your wood floors flawless and shining.
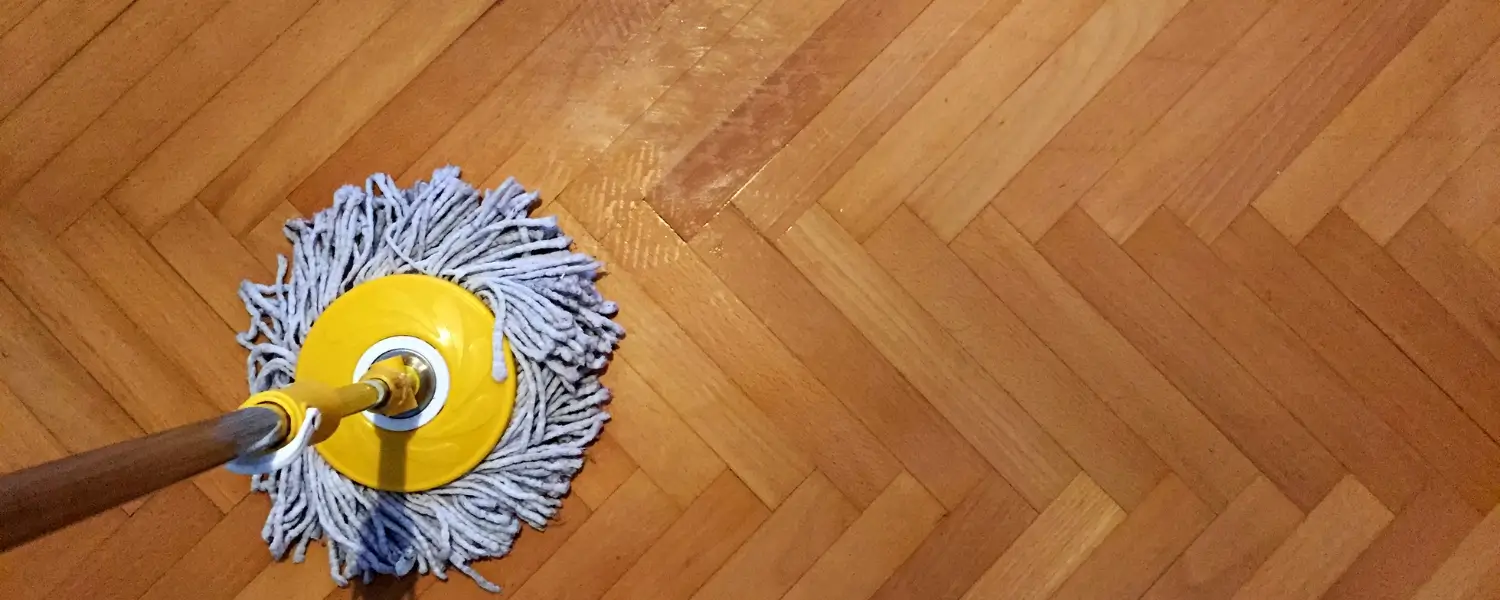
Regular Cleaning
Dust and dirt wear down wood floors. Sweep or vacuum often using a soft brush. Clean spills quickly to avoid stains. Use a damp mop with wood floor cleaner. Avoid soaking floors with water. Dry floors right after mopping. Regular cleaning keeps floors bright and smooth.
Preventing Scratches
Furniture and shoes cause most scratches. Place felt pads under table and chair legs. Remove shoes that may track dirt or grit. Keep pet nails trimmed to avoid marks. Use rugs in high-traffic areas. Avoid dragging heavy furniture across floors. These steps protect your wood from scratches.
Refinishing When Needed
Over time, floors lose their shine and show wear. Refinishing restores the wood’s natural beauty. Sand the surface lightly to remove scratches. Apply a fresh coat of finish or sealant. Refinishing renews floors and protects against damage. Plan refinishing every few years for best results.
Frequently Asked Questions
How Do I Prepare Wood Floors Before Finishing?
Clean the floor well to remove dirt and dust. Sand the surface smoothly to help the finish stick better.
What Type Of Finish Gives Wood Floors A Flawless Look?
Use a high-quality polyurethane finish for durability and shine. It protects wood and makes floors look smooth.
How Often Should Wood Floors Be Cleaned To Stay Flawless?
Clean floors weekly with a soft broom or vacuum. Avoid water spills to prevent damage and keep floors shiny.
Can Scratches On Wood Floors Be Repaired Easily?
Small scratches can be fixed with a wood stain marker. For deep scratches, sanding and refinishing may be needed.
Conclusion
Achieving flawless wood floors takes patience and care. Clean regularly to keep dirt away. Use the right products for your floor type. Repair scratches and dents quickly to avoid damage. Keep furniture from scratching the surface. Proper maintenance helps floors look new longer.
Small efforts lead to beautiful, lasting results. Your home will feel warm and inviting. Enjoy the natural beauty of your wood floors every day.